A Developer's Guide to Creating an API
Before you write a single line of code, you need a plan. A solid API starts with a blueprint that clearly defines its purpose, its audience, and its architecture. Think of it as figuring out what problems the API will solve, choosing the right tools for the job (like REST or GraphQL), and sketching out the design with a spec like OpenAPI.
Laying the Groundwork for a Powerful API

Jumping straight into coding an API without a plan is a classic mistake. It feels like you're moving fast, but it’s a shortcut to messy endpoints, confusing documentation, and a painful experience for any developer who has to use your work. I've seen it happen time and again—it almost always leads to costly rework down the road.
The best APIs I've ever worked with were all born from a thoughtful design-first approach. It's about putting yourself in the shoes of the end-user and prioritizing clarity and purpose from day one.
This isn't just my opinion; it’s a major trend. The industry is moving towards an API-first methodology, where the API is treated as a core product, not an afterthought. The latest State of the API Report shows that 74% of organizations now follow an API-first approach, up a full 8 points from 66% the previous year. That’s a huge shift.
Defining Your API's Purpose and Audience
So, where do you start? Before you get lost in technical details, you need to answer two simple but critical questions: Who is this for? and What problem does it solve?
Get specific about your target developers. Are they front-end engineers building a mobile app who need lightweight responses? Or are they data scientists who need to pull massive datasets for analysis? Maybe they’re third-party partners who need a dead-simple way to integrate with your platform. Each group has vastly different needs.
Once you know your audience, map out the "jobs to be done." For an e-commerce API, this might look like:
- Let a partner fetch the entire product catalog.
- Allow a mobile app to manage a user's shopping cart.
- Enable an internal dashboard to track order fulfillment.
Nailing these use cases early on keeps you focused on building features that actually matter. It’s the best defense against scope creep and wasted engineering hours.
Choosing Your API Architectural Style
With a clear purpose in mind, it’s time to pick your architectural style. Today, the choice usually comes down to REST or GraphQL. There's no single "best" option—the right one depends entirely on what you're trying to build.
Choosing Your API Architectural Style REST vs GraphQL
Here's a quick breakdown to help you decide which architectural style fits your project's needs.
| Characteristic | REST (Representational State Transfer) | GraphQL (Graph Query Language) |
|---|---|---|
| Data Fetching | Client gets a fixed data structure from each endpoint (over/under-fetching is common). | Client requests exactly the data it needs, no more, no less. |
| Endpoints | Multiple endpoints for different resources (e.g., /users, /products). |
Typically a single endpoint (/graphql) for all queries and mutations. |
| Learning Curve | Easier to learn, based on standard HTTP conventions everyone knows. | Steeper learning curve; requires understanding of schemas, queries, and resolvers. |
| Best For | Standard CRUD apps, public APIs where simplicity and predictability are key. | Mobile apps, complex UIs with nested data, and scenarios where network efficiency is critical. |
| Caching | Straightforward; uses standard HTTP caching mechanisms. | More complex; caching is handled at the client level, often with specialized libraries. |
REST is the industry workhorse. It’s been around forever, it’s straightforward, and it uses the standard HTTP methods (GET, POST, PUT, DELETE) that are already built into the web. Its stateless, resource-based approach makes it incredibly reliable for most standard API needs.
GraphQL, on the other hand, gives the client all the power. Instead of hitting multiple endpoints to gather data, a client sends a single query to one endpoint and gets back exactly what it asked for. This is a game-changer for mobile apps or complex front-ends, as it eliminates the round-trips and bloated responses that can slow things down.
My rule of thumb: Go with REST for its simplicity and broad compatibility, especially for resource-oriented services. Choose GraphQL when you need to give clients fine-grained control over data, especially in situations where network bandwidth is a real concern.
Thinking about this stuff from the very beginning is what leads to seamless API integration. It's the difference between an API that developers love and one they’re forced to tolerate.
Building Your Endpoints and Core Logic
Okay, you've got your design blueprint in hand. Now comes the fun part: turning those plans into actual, working code. This is where we shift from abstract ideas to concrete implementation, building the digital pathways that applications will use to talk to your service. We'll be setting up a server, defining the API's endpoints, and writing the logic that makes it all tick.
For our examples, we’re going to stick with Node.js and the Express framework. Why? Because they're straightforward, incredibly popular, and get the job done without a lot of boilerplate. Express gives you a lean foundation to build on, which is perfect for getting a server up and running quickly, but it’s more than powerful enough for serious production systems.

Think of that initial setup as the skeleton. From here, we'll start adding the muscle—the routes and logic that bring your API to life.
Structuring Your Project for Scalability
Before you write a single line of endpoint code, take a moment to think about your project's structure. A messy codebase becomes a nightmare to maintain, debug, or expand later on. Trust me, a little foresight here saves a world of pain.
A solid, battle-tested pattern is to separate your application into distinct layers:
- Routes: These files define your API's endpoints, like
/usersor/products. They’re the entry point. - Controllers: This is where the request-handling logic lives. A controller takes an incoming request, does something with it, and sends back a response.
- Services: Here you’ll find the core business logic. This layer is kept clean from any HTTP-specific stuff, making it reusable and easier to test.
- Models: These define your data structures and handle all the direct interaction with your database.
This separation of concerns is a game-changer. It keeps your code for handling web traffic completely separate from your core business rules, leading to a much more robust and maintainable API.
Defining Routes and HTTP Methods
Your API's routes are the public-facing URLs that other developers will use to interact with your service. An endpoint is the combination of a specific URL and an HTTP method.
This is where RESTful conventions really shine. They provide a standardized, predictable way to name your endpoints and map them to specific actions using HTTP methods (often called verbs). This predictability is the secret to a great developer experience.
My biggest piece of advice: Always use plural nouns for your resource collections. It’s a simple convention that makes an API instantly more intuitive. For example, use
/usersfor a collection of users, not/user.
The main HTTP verbs you’ll be working with are:
- GET: To retrieve a resource or a list of them. It's a read-only, safe operation.
- POST: To create a brand-new resource.
- PUT / PATCH: To update an existing resource. The classic distinction is that
PUTreplaces the entire resource, whilePATCHjust applies a partial update. - DELETE: To remove a resource permanently.
Implementing Your First Endpoint
Let's make this real. Imagine we’re building an API for a simple blog and need an endpoint to fetch all the posts. With Express, the code is surprisingly simple.
// Import the express library
const express = require('express');
const app = express();
// A mock database of posts for our example
const posts = [
{ id: 1, title: 'API Design Best Practices', author: 'Jane Doe' },
{ id: 2, title: 'Getting Started with Node.js', author: 'John Smith' }
];
// Define the GET endpoint for retrieving all posts
app.get('/posts', (req, res) => {
res.json(posts);
});
// Start the server
const port = 3000;
app.listen(port, () => {
console.log(Server is running on http://localhost:${port});
});
See that app.get('/posts', ...) line? That's the heart of it. We're telling our server to listen for GET requests at the /posts URL. When one arrives, the function fires off and sends our posts array back as a JSON response. This is the fundamental building block of any API.
If you’re building in a serverless environment, a service like AWS API Gateway is your best friend for managing this. To learn more about that, check out this excellent guide on Amazon API Gateway for Serverless APIs.
Handling Request Data and Crafting Responses
Of course, your API will need to do more than just send data; it needs to receive it, too. What happens when a user wants to create a new blog post? That data usually arrives in the body of a POST request.
Here’s how you could implement an endpoint to create a new post:
// Middleware to parse JSON bodies
app.use(express.json());
// Define the POST endpoint for creating a new post
app.post('/posts', (req, res) => {
const newPost = {
id: posts.length + 1, // Simple ID generation for now
title: req.body.title,
author: req.body.author
};
posts.push(newPost);
// Send a 201 Created status code with the new resource
res.status(201).json(newPost);
});
A couple of crucial details here. First, we add app.use(express.json()). This is middleware that automatically parses any incoming JSON payload, making it available on req.body. Then, after creating the new post, we send back a status code of 201 Created. This isn't just a random number; it's the correct HTTP standard for a successful resource creation. We also include the newly created object in the response.
It’s these little, professional touches that separate a merely functional API from a truly great one.
Locking the Doors and Planning for the Future: Security and Versioning
So, you’ve got a functional API. Great. But before you push it into the wild, you need to address two things that will make or break its long-term success: security and versioning. An unsecured endpoint is a playground for bad actors, and an API that changes on a whim will quickly become an API nobody uses.
Think of authentication as the bouncer at your API's front door. It’s all about controlling who gets in. The right method really depends on what you're protecting and who you're letting in.
How to Authenticate: Picking the Right Lock
For simple machine-to-machine communication or internal tools where trust is high, a basic API key often does the job. You generate a unique key for a client, they pop it into their request headers, and you’re good to go. It’s fast and easy, but just remember: if that key gets leaked, it’s compromised for good until you manually revoke it.
A much safer bet for most modern applications is token-based authentication, usually with JSON Web Tokens (JWTs). The flow is simple: a user logs in once with their credentials, your server issues a short-lived, digitally signed token, and the client sends that token back with every future request. This is a huge step up from static keys because the tokens expire, limiting the window of opportunity if one is ever compromised.
Then you have the gold standard for third-party access: OAuth 2.0. If you're building an application that needs to, say, access a user's Google Calendar or post to their Twitter feed, OAuth is the way to go. It’s a protocol that lets users grant your app limited access to their data on another service without ever handing over their password. It's definitely more complex to set up, but for delegated access, there’s no better or more secure option.
The key is to match the lock to the value of what's behind the door. API keys are fine for trusted, low-risk scenarios. JWTs are the workhorse for most user-facing apps. And OAuth 2.0 is the non-negotiable choice when you need to act on a user's behalf on another platform.
Getting this right isn't just a technical detail; it's big business. The API management market exploded from $4.5 billion to $5.76 billion recently and is on track to hit $7.16 billion. By 2031, that number is expected to reach a staggering $37.94 billion. That growth is fueled by the critical need for solid practices like these. You can dig into the API management market trends to see just how important this has become.
Don't Break Your Users' Code: The Art of Versioning
Your API will change. It’s a fact of life. You’ll add features, refactor endpoints, and fix bad design decisions. Without a versioning strategy, every one of those updates is a potential breaking change for the developers who rely on your API. And breaking their code is the fastest way to lose their trust.
Versioning is your contract with your users. It says, "We're improving things, but we promise not to pull the rug out from under you." It lets you roll out a new, better version while keeping the old one around long enough for people to migrate on their own schedule.
There are a few ways to do this, but it usually boils down to two popular methods:
In the URL Path: This is the most common and arguably the clearest approach. You just stick the version number right in the endpoint, like
/v1/usersor/v2/products. It’s dead simple for everyone to see, understand, and even test right in their browser. No magic required.In the Headers: A slightly more "academically correct" method is to keep the URL clean (
/users) and have the client request a specific version via a custom header, likeAccept: application/vnd.myapi.v1+json. While elegant, it hides the versioning from plain sight and makes quick tests or debugging a bit more of a hassle.
Honestly, for most teams, just put it in the URL. Path versioning is pragmatic, easy to implement, and impossible to miss. It gets the job done without any fuss. If you want to go deeper on this, we've got a whole guide on API versioning best practices.
Nail down your security and versioning from the start, and you'll build an API that's not just functional, but also trusted, stable, and ready to evolve.
Testing Your API with Mocking and Automation
You’ve designed your endpoints, layered on security, and even planned for future versions. So, how do you make sure your API won't crumble under the pressure of real-world use without, you know, actually breaking things in production? This is exactly where a smart testing strategy, built on mocking and automation, becomes your secret weapon.
In the old days, testing meant firing up massive staging environments and hoping all the live, dependent services were actually working. This approach is painfully slow, surprisingly expensive, and incredibly fragile. If just one downstream service hiccups, your entire testing pipeline can grind to a halt for hours.
The Power of Mock APIs
This is why mock APIs have become so indispensable. A mock API is essentially a lightweight, simulated version of your real API that behaves exactly like the genuine article. It returns the same types of responses, headers, and status codes but runs completely on its own, no backend or database required.
This decoupling is a total game-changer for development speed. It lets your frontend and backend teams work in parallel. The frontend team can start building against a stable, predictable mock server long before the backend code is even close to being finished.
A well-designed mock API is more than just a placeholder; it’s a dynamic testing environment. It gives you the power to simulate scenarios that are a nightmare to reproduce with live services, like sudden network failures or specific, obscure error responses from a dependency.
Tools like dotMock make this ridiculously easy. Instead of hand-coding a mock server from scratch, you can generate one automatically in seconds. You can do this by recording live network traffic, importing an OpenAPI spec you already have, or even just describing what you need in plain English. For a deeper look at the fundamentals, check out our guide on how to do API testing.
This diagram gives a great overview of the core flow you'll need to replicate in your tests—from authentication to authorization and versioning.
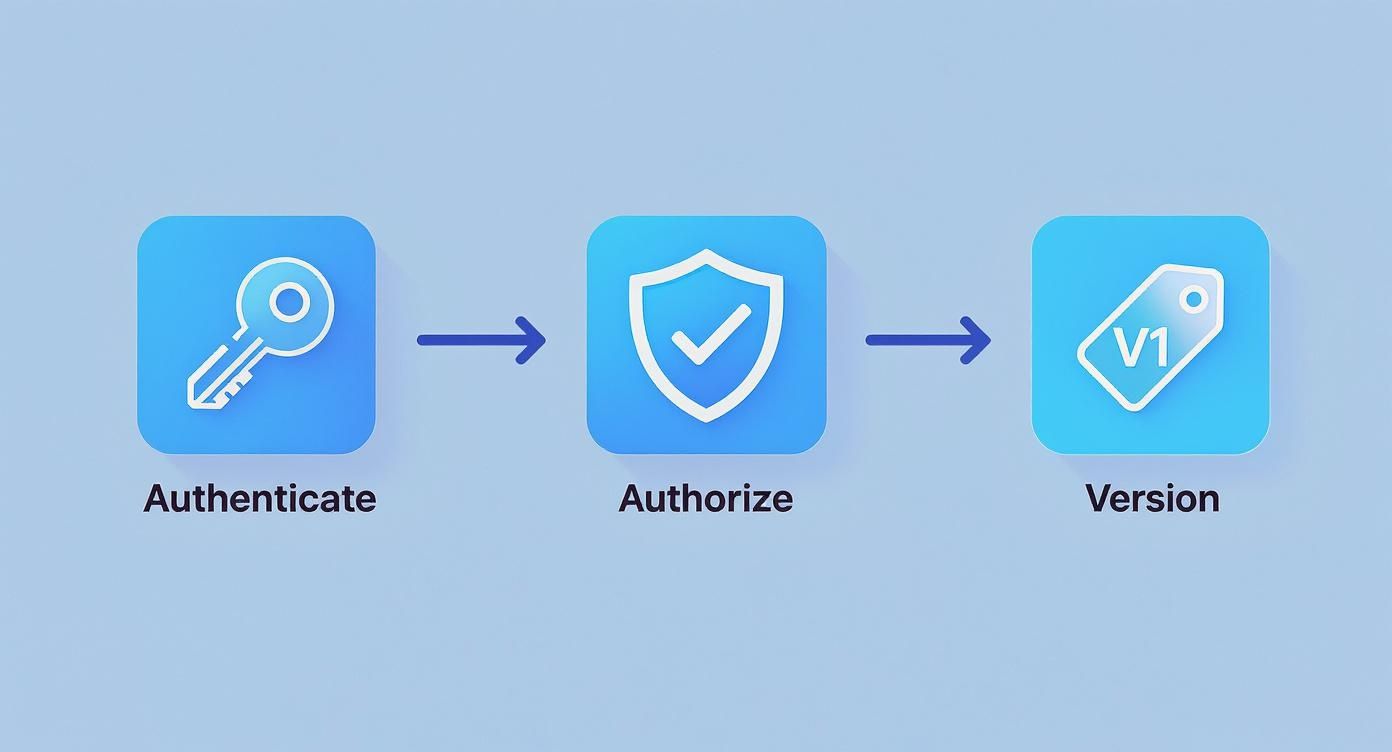
It highlights the critical checkpoints every API call goes through. Testing how your application reacts when something fails at any one of these stages is absolutely vital for building a robust system.
Simulating Real-World Chaos
A truly resilient application isn’t one that never fails—it’s one that handles failure gracefully. But how do you test for chaos without deliberately crashing your own servers? This is where advanced mocking really shines. You can configure your mock API to throw all sorts of curveballs on demand.
- HTTP 500 Server Errors: What happens when a service your API relies on suddenly goes dark? A mock can be told to return a
500 Internal Server Errorfor a specific endpoint, letting you test your app's retry logic and how it communicates that error to the user. - Network Timeouts: The internet isn't always fast. You can simulate a laggy network by programming an artificial delay into your mock API’s response. This is perfect for ensuring your client-side application doesn't just hang forever, waiting for a response that's taking too long.
- Rate Limiting: If a user hammers your API too hard, you should return a
429 Too Many Requestsstatus code. Mocking this behavior allows you to verify that your client app correctly backs off and maybe shows a message, instead of just continuing to spam the server.
By systematically running through these failure scenarios, you build an application that doesn't just work on a "sunny day" but stays stable and user-friendly even when the storm hits.
Integrating Automated Tests into Your CI/CD Pipeline
Ultimately, the goal is to squash bugs before they ever see the light of day. The most effective way to achieve this is by plugging your API tests directly into your Continuous Integration/Continuous Deployment (CI/CD) pipeline.
A CI/CD pipeline is an automated workflow that handles the building, testing, and deployment of your code. Every time a developer commits a change, the pipeline can automatically kick off a suite of tests against your mock API. If a single test fails, the build is stopped in its tracks, and the developer gets an immediate notification.
This automated safety net pays off in several huge ways:
- Find Bugs Early: You catch issues within minutes of them being introduced, which is when they are cheapest and easiest to fix.
- Deploy with Confidence: With every merge validated, your team gains the confidence to ship changes more frequently.
- Boost Developer Velocity: Automating repetitive testing frees up your engineers to focus on what really matters: building great features.
This tight feedback loop is the hallmark of high-performing engineering teams. When you combine the flexibility of mock APIs with the rigor of CI/CD automation, you create a powerful system that ensures your API is always reliable, resilient, and ready for whatever your users throw at it.
Preparing Your API for Deployment
You’ve designed, built, and tested your API. Now comes the moment of truth: getting it out into the real world. This is where you switch gears from being a developer to being an operator. The focus shifts entirely to reliability, performance, and how your API will behave under the pressure of real, unpredictable traffic. A great launch is about more than just flipping a switch; it's about being ready for what comes next.
This is the culmination of all your hard work. Getting this last mile right ensures your API becomes a stable, valuable tool for its users. And the stakes are high—the global open API market is expected to rocket from $4.53 billion to an incredible $31.03 billion by 2033. That explosive growth, detailed in an analysis of the API market on Integrate.io, shows just how critical a solid deployment strategy has become.
Optimizing for Production Performance
In a live environment, performance isn't a feature; it's a requirement. An API that feels sluggish will be dropped in a heartbeat, no matter how clever its design. Two areas will give you the most bang for your buck right away: database queries and caching.
First, take a hard look at how your API talks to its database. Are your queries as lean as they can be? I've seen a single inefficient query with a clumsy join or a missing index cripple an entire application once it's hit with real traffic. Use your database's built-in analysis tools to hunt down these bottlenecks. A little optimization here can lead to massive performance wins.
Next, you need a smart caching strategy. Caching is all about storing frequently accessed data in a high-speed, in-memory store like Redis. Instead of hammering your database for the same piece of information repeatedly, you can serve it almost instantly from the cache. This dramatically cuts down latency for your most common requests.
Pro Tip: Don't try to cache everything at once. Start with your read-heavy endpoints that serve data that doesn't change often—things like user profiles, configuration settings, or product catalogs. This targeted approach delivers the biggest impact for the least amount of effort.
Setting Up Logging and Monitoring
Once your API is live, you can't afford to fly blind. Think of logging and monitoring as your command center, giving you a real-time view of your API's health and usage patterns. Without them, you're just guessing when things inevitably go wrong.
Good logging is more than just catching errors. You should be logging key application events and request details to build a clear audit trail. This becomes invaluable when you're trying to debug a tricky issue that only shows up in production.
Monitoring takes it a step further, providing you with a live dashboard of your API's vital signs. At a minimum, you should be tracking:
- Request Rate: How many requests are you handling per minute?
- Error Rate: What percentage of requests are failing?
- Latency (Response Time): How long does your API take to respond? It's even better if you can break this down by endpoint.
Tools like Prometheus, Grafana, or Datadog are fantastic for visualizing these metrics. They let you set up alerts for weird spikes or sudden changes, so you can jump on problems before your users even notice.
Automating Deployments with CI/CD
Let's be honest: manual deployments are slow, stressful, and a recipe for mistakes. A Continuous Integration/Continuous Deployment (CI/CD) pipeline is your solution. It automates the entire release process, from running your tests all the way to deploying the code, making every release consistent and reliable.
Here’s a quick rundown of how a CI/CD pipeline typically works:
- A developer pushes new code to a repository like Git.
- The CI server immediately picks up the changes and runs your full suite of automated tests.
- If the tests all pass, the code is packaged into a deployable artifact.
- The CD system then takes over and automatically pushes this new version to your production environment.
This level of automation does more than just reduce human error. It empowers your team to ship updates faster and with way more confidence. Deployments stop being a dreaded, all-hands-on-deck event and become a routine, push-button process. This is the final piece of the puzzle for launching and maintaining a truly professional API.
Common Questions We Hear About Building APIs
Even with the best-laid plans, you're going to hit some bumps in the road during development. When you're deep in the code building an API, it's the little details that can trip you up. Let's tackle some of the most common questions I see developers ask, with some straight-to-the-point answers to keep your project on track.
How Should I Handle Errors?
Great error handling is the difference between a frustrating developer experience and a fantastic one. Please, don't just throw a generic 500 Internal Server Error for every problem. You have to be more descriptive than that.
A genuinely useful error response gives the developer three pieces of information:
- A specific HTTP status code that actually reflects the issue (e.g.,
404 Not Found,400 Bad Request). - A machine-readable error code they can program against (like
invalid_api_key). - A clear, human-readable message that explains what went wrong (for instance, "The 'email' field is required.").
Giving them this trifecta means they can debug the issue on their own, without having to guess what your API didn't like about their request.
When Should I Use PUT vs. PATCH?
This is a classic debate, and I see teams get tangled up on it all the time. Both PUT and PATCH are for updating a resource, but the way they do it is fundamentally different.
Use
PUTfor a complete replacement. When a client usesPUT, they're saying, "Here is the new version of this entire resource." Any fields they don't include are basically wiped out or set to null. It's an all-or-nothing operation.Use
PATCHfor a partial update. APATCHrequest is much more surgical. It's designed to apply a small change. The client only sends the fields they want to modify, and the server updates just those specific parts.
For most modern APIs I work on, PATCH is the more practical and efficient choice. It saves the client from having to fetch the entire resource just to tweak a single value.
What Makes API Documentation Great?
Your documentation isn't just a manual; it's a core feature of your API. The best docs I've ever used are always crystal clear, thorough, and, most importantly, interactive.
First off, they cover the essentials right away: how to authenticate, what the common error codes are, and what the rate limits look like. Then, for each endpoint, you get the full picture—the HTTP method, the URL path, all the required parameters, and example request bodies.
But the real game-changer is providing example responses for both successful calls and failures. This is where interactive documentation, like the kind you can generate from an OpenAPI (formerly Swagger) spec, is worth its weight in gold. It lets developers make live API calls right there in the browser, which cuts their integration time from hours to minutes. Trust me, bad documentation is a top reason developers give up on an API. Time spent here is one of the best investments you can make.
Ready to stop waiting on backend dependencies and start testing your API's resilience? With dotMock, you can generate mock APIs in seconds by recording traffic, using AI, or importing an OpenAPI spec. Simulate timeouts, 500s, and rate limits to build truly robust applications. Get started for free at dotmock.com.