Build an API From Scratch Your Complete Guide
Building an API from the ground up isn't just a coding exercise. It's a clear, four-part journey: you strategize your goals, design the experience, develop the code, and then deploy it securely. That first part—the planning—is where most projects succeed or fail. It’s where you ensure the final product actually solves a real problem for your business and its users.
Setting the Stage for a Successful API
Before you even think about writing code, you need to build a solid foundation. A great API is a product, plain and simple. It’s not just a technical afterthought. If you start with that product-centric mindset, you're already on the right track to build something people will actually want to use.
This early stage is all about asking the big questions. What's the business goal here? Are we building this to power a new mobile app, clean up our internal data workflows, or create new revenue streams with partners? Defining the "why" from the get-go will make every other decision down the line infinitely easier.
Defining Your Audience and Core Functionality
Once you know your purpose, you need to figure out who you’re building this for. The needs of your internal engineering team are completely different from the needs of an external developer you've never met.
Think about the potential user groups:
- Internal Teams: These folks need efficiency and stability to build your company's own applications. The API should be tailor-made to simplify their specific jobs.
- Partner Developers: Businesses you’re working with need secure, well-documented APIs to connect their services with yours. It’s all about creating mutual value.
- Public Developers: This is the widest audience. They need a dead-simple onboarding process, documentation that’s crystal clear, and a rock-solid platform to build their own ideas on top of your service.
Knowing your audience helps you lock down the core functionality. Don't fall into the trap of trying to build everything at once. Focus on a minimum viable feature set that delivers immediate value. The best APIs often start small and grow based on real user feedback.
"Treating your API as a product means you're not just building a technical interface; you're crafting a user experience for developers. Your goal is to make their job as easy and intuitive as possible."
Embracing an API-First Approach
The best way to guarantee your API hits the mark is to adopt an API-first approach. This strategy means you design and document the API contract before writing a single line of implementation code. It’s a powerful method we cover in-depth here: https://dotmock.com/blog/api-first-approach. It flips the old development model on its head and forces everyone to agree on the design and user experience right from the start.
This isn’t just a niche idea anymore; it's becoming the industry standard. API-first adoption jumped from 66% in 2023 to 74% in 2024, which shows a massive shift in how teams are building software. This trend is backed by serious money, too—the API management market is expected to grow from USD 7.6 billion in 2024 to USD 16.9 billion by 2029.
A solid strategy session is where it all begins.
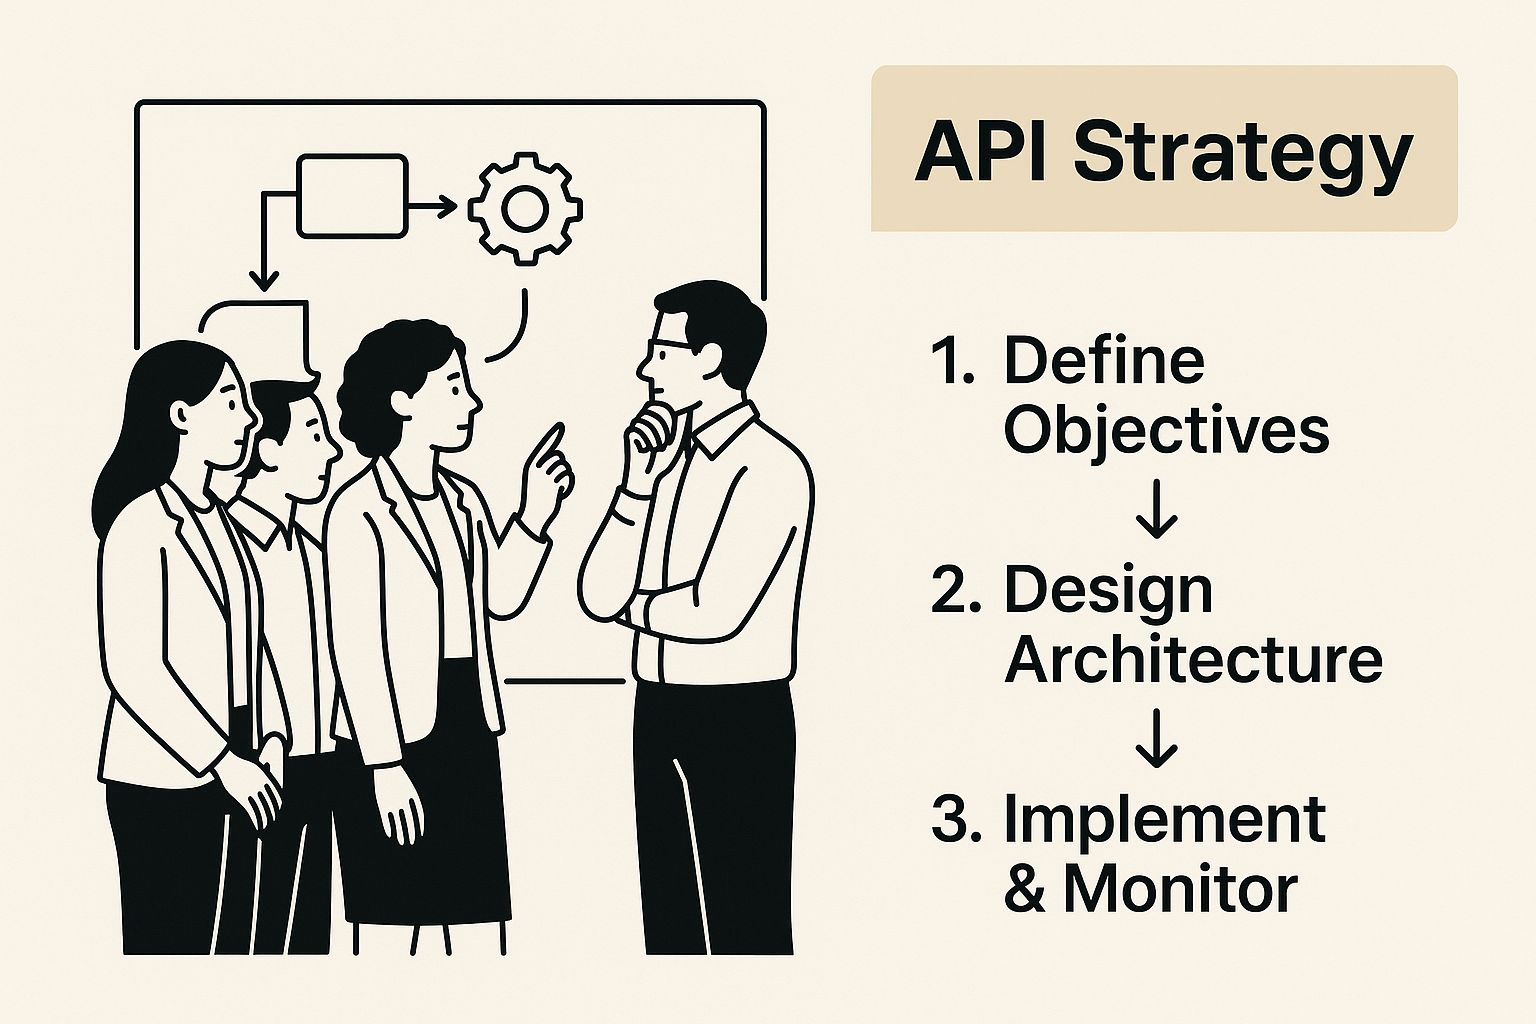
As you can see, successful API development starts with collaborative planning. It's about getting business goals and technical execution aligned from day one.
Choosing the Right API Architecture
Finally, you need to pick an architectural style. This is a critical choice that will dictate how your API is structured, how it behaves, and how developers interact with it. The three most common styles today are REST, GraphQL, and gRPC. If you're new to this, it’s worth taking a moment to understand the fundamentals, like what a REST API is, before making a decision.
To help you choose, here's a quick look at the three primary API architectural styles and what they're best suited for.
Choosing Your API Architecture
| Architecture | Best For | Key Characteristics |
|---|---|---|
| REST | Standard CRUD operations, public-facing APIs | Stateless, resource-based, uses standard HTTP methods |
| GraphQL | Mobile apps, complex data requirements | Clients request exactly the data they need, single endpoint |
| gRPC | High-performance microservices, internal APIs | Uses HTTP/2 for performance, contract-based with Protobuf |
Your final choice really boils down to your specific use case. REST is a fantastic, well-understood default for many projects. GraphQL gives front-end clients incredible flexibility, and gRPC is the king of high-speed internal communication between services. Choose wisely
Designing an API Developers Will Love
Once you've got your strategy locked in, it's time to get practical and sketch out the blueprint. This is the API contract—the formal handshake between your service and the developers who will bring it to life in their applications. Think of it as the architectural plan for a house. A solid design from the start saves a world of pain later.
A great API just feels right. It’s predictable. When a developer makes a call, they should have a good idea of what they'll get back, without having to second-guess everything. That’s why sticking to established standards is so critical.
Adopting a Design Standard
To get that consistency, you need a formal specification. Right now, the OpenAPI Specification (formerly Swagger) is the undisputed king for designing RESTful APIs. It gives you a way to define every single part of your API in a language that both humans and machines can understand—from endpoints and data models to how authentication works.

Starting with an OpenAPI document isn't just extra work; it pays off big time. Here’s why:
- It’s Your Single Source of Truth: Your frontend, backend, and QA teams are all on the same page. No more arguments about what a response is supposed to look like.
- Documentation on Autopilot: You can generate beautiful, interactive documentation straight from the spec file. This saves an incredible amount of time.
- A Head Start on Code: Plenty of tools can generate client SDKs and server stubs from an OpenAPI definition, giving your development teams a massive productivity boost.
When you start with a design-first approach, you're putting the developer experience front and center, where it belongs.
Crafting Intuitive Endpoints
The URLs, or endpoints, are the most visible part of your API. Keep them clean and logical. The trick is to think in terms of resources—the nouns of your API, like users, projects, or tasks.
Your URLs should reflect a clear hierarchy. And a pro-tip I always share: use plural nouns for your collections. It just makes sense.
Let's say you're building a simple project management API. A logical endpoint structure would look something like this:
| HTTP Method | Endpoint | Action |
|---|---|---|
GET |
/projects |
Fetches a list of all projects. |
POST |
/projects |
Creates a new project. |
GET |
/projects/{projectId} |
Gets a single project by its ID. |
PUT |
/projects/{projectId} |
Updates a specific project. |
GET |
/projects/{projectId}/tasks |
Lists all tasks for a specific project. |
POST |
/projects/{projectId}/tasks |
Creates a new task within a project. |
See how clean that is? It's predictable. A developer can probably guess how to get tasks for a project without even glancing at the docs. Consistency is the name of the game. If you want to go deeper, our guide on the best practices for API design covers more advanced patterns.
Defining Clear Request and Response Models
Just as crucial as the endpoints are the data structures you send and receive. When a developer wants to create a new project, they need to know exactly what fields are required (name, description) and what the data types are. No ambiguity.
The same goes for responses. A project object returned from your API should have the exact same structure every single time.
A common pitfall I see is inconsistent naming. Pick a convention and stick to it. If you use
camelCase(likecreatedAt), use it everywhere. If you prefersnake_case(likecreated_at), apply it universally. Mixing them up is a surefire way to frustrate developers.
Your OpenAPI spec is where you'll nail all this down. You’ll define each field, its data type (string, integer, boolean), and whether it's required. This level of precision removes the guesswork and empowers developers to integrate with your API quickly and confidently. That's how you build something people genuinely enjoy using.
Speed Up Your Timelines with API Mocking
Why let your development process grind to a halt? One of the most common bottlenecks I see when teams build a new API is the dependency between frontend and backend. Your UI developers are ready to go, but they're stuck waiting for the backend team to finish and deploy a working endpoint. It's a classic serial workflow that creates delays and slows down the entire release cycle.
This is exactly the problem API mocking was designed to solve. It's a powerful technique that decouples your development streams, allowing frontend and backend teams to work independently. Instead of waiting, your frontend team can build against a simulated, or "mock," API that behaves just like the real one will.

As you can see, modern tools make it incredibly straightforward to spin up realistic mock endpoints. By creating this simulated environment, you empower your teams to work in parallel—a massive accelerator for any project.
The Power of Parallel Workflows
The real magic of mocking is that it enables parallel development. Imagine your backend team is still deep in the weeds, figuring out database logic. At the same time, your frontend team can be building the entire user interface, making real HTTP requests to a mock server that returns the exact data structures defined in your API design.
This simple shift completely transforms your development process:
- Get Feedback Faster: Frontend developers can build and test UI components with realistic-looking data immediately. This helps catch design and usability issues weeks earlier than you normally would.
- Eliminate Bottlenecks: No more "I'm blocked" messages in Slack. Both teams can make meaningful progress at the same time, which can drastically shorten your project timeline.
- Improve Collaboration: The mock API acts as a shared contract. With both teams working from the same playbook, those painful integration headaches down the line are practically eliminated.
By simulating the final API, you're not just faking data; you're creating a reliable contract that both frontend and backend teams can trust. It’s a foundational practice for any team serious about shipping quality software faster.
Mocking is actually a specific type of a broader concept known as service virtualization. If you're interested in the theory behind it, you can learn more about what service virtualization is and how it applies to more complex systems.
Setting Up a Practical Mock Server
Getting started with a mock server is surprisingly simple, especially with a tool like dotMock. You can spin up a realistic mock API from your OpenAPI specification in just a few clicks. The goal is to create a simulation that is indistinguishable from the real API from your client's perspective.
When choosing a mocking tool, here are the key capabilities I'd look for:
- Static and Dynamic Responses: You need to be able to configure endpoints to return predictable, static JSON for simple cases. But for more complex scenarios, look for the ability to use dynamic data generation to return varied, realistic responses on every call.
- Status Code Simulation: Don't just test the happy path. A good mock server lets you simulate a full range of HTTP status codes. This is how you test how your app handles a
201 Createdon a successful post, a404 Not Foundfor a missing resource, or a500 Internal Server Errorwhen things inevitably go wrong. - Latency Injection: Real-world networks aren't instant. The ability to add artificial delays (latency) is crucial for testing how your application behaves on a slow connection. Does it show a loading spinner, or does it freeze up entirely?
Simulating Real-World Scenarios
The true value of API mocking becomes clear when you move beyond simple success cases and start building for resilience. Your application needs to be robust enough to handle the unpredictable nature of networks.
Think about it from a user's perspective. What happens when they try to submit a form in your app, but the backend API is temporarily down? Without proper testing, your user might just see a frozen screen with no feedback. That's a terrible experience.
Using a tool like dotMock, you can easily configure the /submit endpoint to return a 503 Service Unavailable error. This allows your frontend team to build and verify the user-facing error handling logic, ensuring the app fails gracefully. This level of comprehensive testing is nearly impossible to replicate safely and consistently with a live development server. It’s how you build truly resilient applications.
Bringing Your API to Life with Code
Now for the fun part. You’ve got a solid design and a working mock server. It’s time to take that blueprint—your OpenAPI specification—and build the real thing. This is where we write the code that makes your API tick, turning your plans into a tangible, high-performing application.
The first big call you have to make is choosing the right technology. Honestly, there are a ton of great options out there, so don't get bogged down trying to find the "perfect" one. Most modern frameworks will get the job done well.
Selecting Your Technology Stack
Your tech stack is really just the programming language and framework you’ll use for the build. A couple of the most popular, battle-tested combinations you'll see everywhere are Node.js with the Express framework and Python with either Django or FastAPI.
Let's quickly run through them so you can see what fits best.
- Node.js with Express: This is an absolute beast for I/O-heavy applications. Think real-time chat services or any API that needs to juggle a ton of concurrent connections. Its non-blocking architecture gives it a serious performance edge in these scenarios.
- Python with Django/FastAPI: People love Python for its clean syntax and massive ecosystem of libraries. Django is what I'd call a "batteries-included" framework—it's fantastic for building complex, data-driven APIs without having to reinvent the wheel. FastAPI is a newer player known for its raw speed and slick, automatic documentation features.
My rule of thumb? Go with what your team knows best. A team that lives and breathes Python will get a high-quality Django API out the door much faster than they would fumbling through Node.js for the first time, and vice versa. Familiarity almost always beats any marginal performance gains from a different stack.
Structuring Your Project for Success
A well-organized project is a gift to your future self and anyone else who works on the code. Before you dive into writing your first endpoint, spend a few minutes setting up a sensible folder structure. A common pattern that works wonders is to separate your code by its function.
A typical setup might look something like this:
| Folder | Purpose |
|---|---|
/config |
For all your configuration files, like database connections and API keys. |
/controllers |
This is where the core business logic for each endpoint lives. |
/models |
All your data structures and database schemas are defined here. |
/routes |
Maps incoming API calls to the right controller functions. |
/middleware |
A great spot for functions that handle things like authentication or logging. |
/tests |
Home for all your unit and integration tests. |
This "separation of concerns" makes your codebase so much easier to understand, test, and debug. When a new developer joins the team, they won't have to guess where the user creation logic is or how requests are routed. It's all laid out logically.
Implementing Core Business Logic
With your project structure in place, it’s time to start coding the endpoints. Each one follows a pretty standard flow: receive the request, validate the inputs, execute the core logic, and then send back a response.
One part of this process is non-negotiable: data validation. Never, ever trust data coming into your API. Always check it against the schema you defined in your design. If a request to create a user is missing a required email field, your API should immediately bounce it back with a clear 400 Bad Request error. This simple step is your first line of defense against corrupting your database.
Remember, your code is the ultimate enforcer of your API contract. If your OpenAPI spec says an endpoint returns a
userobject with five specific fields, your code must always return that exact structure. Consistency is what builds trust with the people using your API.
For developers looking to integrate cryptocurrency functionalities, a comprehensive crypto payments API guide is indispensable when bringing your API to life with code. Even for something this specialized, the core principles don't change: validate every input, execute the logic flawlessly, and return a predictable response. This ensures that even complex financial transactions are handled with total reliability, perfectly matching the contract you so carefully designed.
Securing and Stabilizing Your API
Getting the core logic of your API up and running is a major step, but don't pop the champagne just yet. An API that's slow, insecure, or constantly crashing is often worse than having no API at all. Now it’s time to shift your focus from creation to fortification, ensuring the service you’ve built is both reliable and rock-solid for everyone who depends on it.
This isn’t just a "nice-to-have" either. The stakes are getting higher. Recent data shows a worrying trend where average API uptime slipped from 99.66% to 99.46% in just one year, resulting in 60% more downtime. On top of that, a staggering 57% of organizations have been hit with a data breach through an exploited API in the last two years. You can discover more insights about API reliability from Uptrends.com, but the takeaway is clear: robust security and stability are absolutely non-negotiable.
Implementing Essential Security Measures
First things first: you need to control who can access your API. This means implementing several layers of defense to protect your data and shut down potential abuse. Think of it like building security—you need a guard at the door, keycard access for different floors, and maybe even a limit on how many people can be in a room at once.
Your front door is authentication. It’s how your API confirms the identity of whatever client is knocking.
- API Keys: This is the most straightforward approach. You generate a unique, secret string for each client, and they include this key in their requests (usually in a header) to prove who they are. Simple and effective for many use cases.
- OAuth 2.0: When you're dealing with user-specific data, OAuth 2.0 is the gold standard. It’s a more involved but far more secure flow that lets a user authorize your app to act on their behalf without ever handing over their password.
Once you know who is making a request, you have to decide what they’re allowed to do. This is authorization. A regular user should be able to read their own profile, but only an admin should have the power to delete another user's account. These roles and permissions need to be explicitly defined in your code.
Finally, you need to protect your API from being overwhelmed. Rate limiting is your defense against a single user flooding your service with requests, whether it’s a malicious attack or just a buggy script gone wild. It’s a simple but powerful way to maintain stability.
Securing your API is a foundational step that protects both your infrastructure and your users' data. Here’s a quick overview of some essential measures you should consider.
Essential API Security Measures
| Security Measure | Purpose | Common Implementation |
|---|---|---|
| Authentication | To verify the identity of the client making the request. | API Keys, OAuth 2.0, JWT (JSON Web Tokens) |
| Authorization | To define what an authenticated client is allowed to do. | Role-Based Access Control (RBAC), Scopes |
| Input Validation | To protect against injection attacks and malformed data. | Schema validation (e.g., OpenAPI), sanitizing user inputs |
| Rate Limiting | To prevent abuse and ensure service availability for all users. | Token Bucket, Leaky Bucket algorithms |
| HTTPS/TLS | To encrypt data in transit, preventing eavesdropping. | Enforcing HTTPS-only access on all endpoints |
Putting these controls in place creates a strong defensive posture right from the start, making your API a much harder target for bad actors.
A Comprehensive Testing Strategy
How do you know if your API is truly stable? You test it. And then you test it again. Finding bugs before your users do is absolutely critical for building trust and delivering a service people can rely on. A multi-layered testing strategy is the only way to effectively catch issues at every stage of development.
Your testing toolkit should include a few different types of tests:
- Unit Tests: These are small, lightning-fast tests that check individual components of your code—like a single function or method—in complete isolation. They’re great for confirming your core logic is sound.
- Integration Tests: This is where you verify that different parts of your system play nicely together. For example, does your API controller successfully talk to the database and get the data it expects?
- End-to-End (E2E) Tests: The big guns. These tests simulate a real user's journey from start to finish, making actual HTTP calls to your live or staging endpoints to ensure the entire system works as a cohesive whole.
One of the most common mistakes I see is teams relying on just one type of testing. Unit tests are fast but miss integration problems. E2E tests are thorough but can be slow and brittle. The sweet spot is a balanced mix of all three, giving you the best blend of speed and confidence.
Setting Up Monitoring and Logging
Once your API goes live, you need eyes on it. You can't fix problems you don't even know exist, which is where monitoring and logging come into play.
Monitoring tools give you a real-time dashboard of your API's health. You can track key metrics like response times, error rates, and server CPU usage, allowing you to spot performance issues or spikes in errors before they escalate into a full-blown outage.
Good logging, on the other hand, provides the forensic detail you need to debug problems when they inevitably happen. Every API request should generate a log entry with the crucial details: who made the request, what they were trying to do, and the outcome. When a user reports an issue, these logs will be your best friend for troubleshooting and pinpointing the root cause.
Putting Your API Out There
You've done the heavy lifting—your API has a solid design, secure endpoints, and the logic is sound. Now for the final, crucial step: getting it into the hands of developers who will actually use it. This all comes down to two things: creating fantastic documentation and deploying your code so people can access it.
Think of it this way: even the most powerful tool is useless without a good instruction manual. Your documentation is that manual. Clear, interactive, and helpful docs are often the single biggest factor in whether developers embrace your API or give up in frustration.
Creating Documentation Developers Will Actually Use
The good news? All that effort you put into defining your API with an OpenAPI specification is about to pay off, big time. You can use that spec to automatically generate interactive documentation that's a joy to use.
This kind of auto-generated documentation usually gives developers everything they need, right at their fingertips:
- A complete list of every available endpoint.
- The nitty-gritty details on parameters and request bodies.
- Clear examples of what a successful response looks like (and what errors to expect).
- Best of all, a "try it out" feature that lets them make live API calls directly from the browser.
This last point is a game-changer. It lets developers play around with your API and see how it behaves before writing a single line of their own code. It dramatically cuts down the time it takes for them to get up and running.
Your documentation is your API’s storefront. A clean, well-organized, and interactive experience invites developers in. Confusing or outdated docs will turn them away before they even get started.
Don't just take my word for it. The entire industry is pouring resources into this. The global API management market is ballooning, with a compound annual growth rate of 28%. It jumped from USD 4.50 billion in 2022 to USD 5.76 billion in 2023, and it's on track to hit USD 9.70 billion by 2025. This shows just how critical a well-managed API ecosystem has become. You can dig into the full API management statistics on Market.us to see the scale of this trend.
Picking the Right Deployment Strategy
With your documentation looking sharp, it's time to get your API live. The goal is to get it running on a server that's accessible, can handle the load, and doesn't fall over. You've got a few solid options here, each with its own pros and cons.
A popular route is to go with a major cloud provider like Amazon Web Services (AWS) or Google Cloud. They offer a whole spectrum of services, from virtual machines that give you total control to serverless functions that scale up and down automatically. For a lot of projects, a serverless approach using something like AWS Lambda is a fantastic choice. It means you can run your code without ever thinking about managing servers, and you only pay for what you use.
Shipping Updates with CI/CD
The final piece of the puzzle is automating your release process. To get new features and bug fixes out the door quickly and safely, you'll want to set up a CI/CD (Continuous Integration/Continuous Deployment) pipeline. This is basically an automated workflow that connects your code repository (like GitHub) to your live servers.
Here’s how it typically works in the real world:
- A developer pushes new code to the repository.
- A CI server notices the change and automatically runs all your tests.
- If everything passes, the pipeline deploys the new code to production without anyone lifting a finger.
This process eliminates manual errors and gives you the confidence to release changes frequently. It's what separates a professional, maintainable API from a one-off project.
Ready to accelerate your API development and testing? dotMock lets you create realistic mock APIs in seconds, enabling parallel workflows and robust testing without waiting for the backend. Start mocking for free and ship faster today at https://dotmock.com.