Build a Secure API with Authentication
Building an API with authentication means putting a gatekeeper in front of your digital door. It’s all about verifying the identity of any person or application trying to get in, usually with tools like API keys, JWTs, or OAuth 2.0.
This isn’t just a nice-to-have feature; it’s the fundamental first step in building a secure application. Without it, you're leaving your data and services wide open for anyone to wander in and cause trouble.
Why You Can't Afford to Skip API Security

Before we get into the nitty-gritty of implementation, let's be clear: solid API security is the bedrock of any trustworthy application. An unsecured API isn't just a weakness; it's a massive liability. It exposes sensitive user data, your core business logic, and even your infrastructure to a world of threats. We've all seen the headlines—a single unprotected endpoint can be all it takes for a devastating data breach.
The market has certainly taken notice. The global demand for authentication solutions is expected to explode from USD 22.8 billion in 2025 to a staggering USD 98.6 billion by 2035. That kind of growth tells you everything you need to know about how seriously businesses are taking the fight against sophisticated cyberattacks.
The Core Concepts of API Access Control
To build a truly secure system, you have to get comfortable with the two pillars of access control: authentication and authorization. People often mix them up, but they do very different jobs.
- Authentication is all about identity. It answers the question, "Who are you?" This is the step where you check someone's credentials to confirm they are who they say they are.
- Authorization is all about permissions. It answers the question, "Okay, now what are you allowed to do?" Once you've confirmed a user's identity, this step dictates exactly what data they can see and what actions they can take.
Think of it like getting into a secure office building. Showing your photo ID to the front desk is authentication. That ID badge then only opening certain doors—your office floor, for instance, but not the CEO's—is authorization.
I've seen this mistake so many times: developers implement rock-solid authentication but then completely drop the ball on proper authorization. This creates a huge internal security hole where a legitimate, logged-in user can access data or perform actions they should have no right to touch.
Before we move on, let's quickly break down these core security concepts into a simple table to make sure everything is crystal clear.
Core API Security Concepts at a Glance
This table breaks down the essential terms you'll encounter, providing clear and concise definitions for building your foundational knowledge.
| Concept | Description | Primary Use Case |
|---|---|---|
| Authentication | Verifying the identity of a user or client. "Are you who you claim to be?" | Logging into an application, verifying an API key. |
| Authorization | Granting or denying specific permissions to an authenticated user. "What are you allowed to do?" | Restricting access to admin-only endpoints or user-specific data. |
| JWT (JSON Web Token) | A compact, self-contained way for securely transmitting information as a JSON object. | Passing user identity and permissions between services after login. |
| OAuth 2.0 | A standard protocol for authorization, often used for third-party access. | Allowing an application ("Log in with Google") to access your data without sharing your password. |
| API Key | A simple token that a client provides when making API calls. | Granting access to public-facing APIs for tracking usage or basic security. |
Understanding these distinctions is crucial.
This level of security is absolutely critical in high-stakes industries like secure payment processing for online gambling, where compliance and fraud prevention are paramount. Honestly, mastering both concepts is non-negotiable for protecting your application and earning your users' trust.
For a more in-depth look at keeping your endpoints safe, check out our guide on https://dotmock.com/blog/api-security-best-practices.
Choosing the Right Authentication Method
Picking the right authentication for your API isn't a one-size-fits-all deal. It's a critical architectural decision that hinges on your specific needs, forcing you to strike a balance between tough security and how much time you want to spend on implementation. Get it wrong, and you could be looking at serious security holes or a painful refactor down the line.
For example, I've seen teams try to secure a public-facing mobile app with a simple API key, which is a recipe for disaster. On the flip side, implementing the entire OAuth2 framework for a basic internal service is usually just creating unnecessary work for yourself.
Comparing Your Core Options
Let's dig into the three most common ways to handle an api with authentication: API Keys, JSON Web Tokens (JWT), and OAuth2. Each one has its own strengths and is built for different situations.
- API Keys: This is authentication at its simplest. You generate a unique key for a client, and they send it along with every request, usually tucked into a header like
X-API-Key. - JWT (JSON Web Tokens): JWTs are self-contained, digitally signed tokens that securely pack user information (called "claims"). After a user logs in, the server gives them a JWT to include in the
Authorizationheader of future requests. - OAuth2: It's important to know that OAuth2 is an authorization framework, not strictly an authentication method. It’s designed to let users give one application permission to access their data on another service, all without handing over their password.
The real game-changer between these methods is state. API Keys and JWTs are brilliant for stateless systems because the server doesn't have to remember anything about the session. OAuth2, however, is all about state—it’s a multi-step dance of requests and redirects to grant and verify access.
The chart below gives a quick visual on the trade-offs between these approaches.
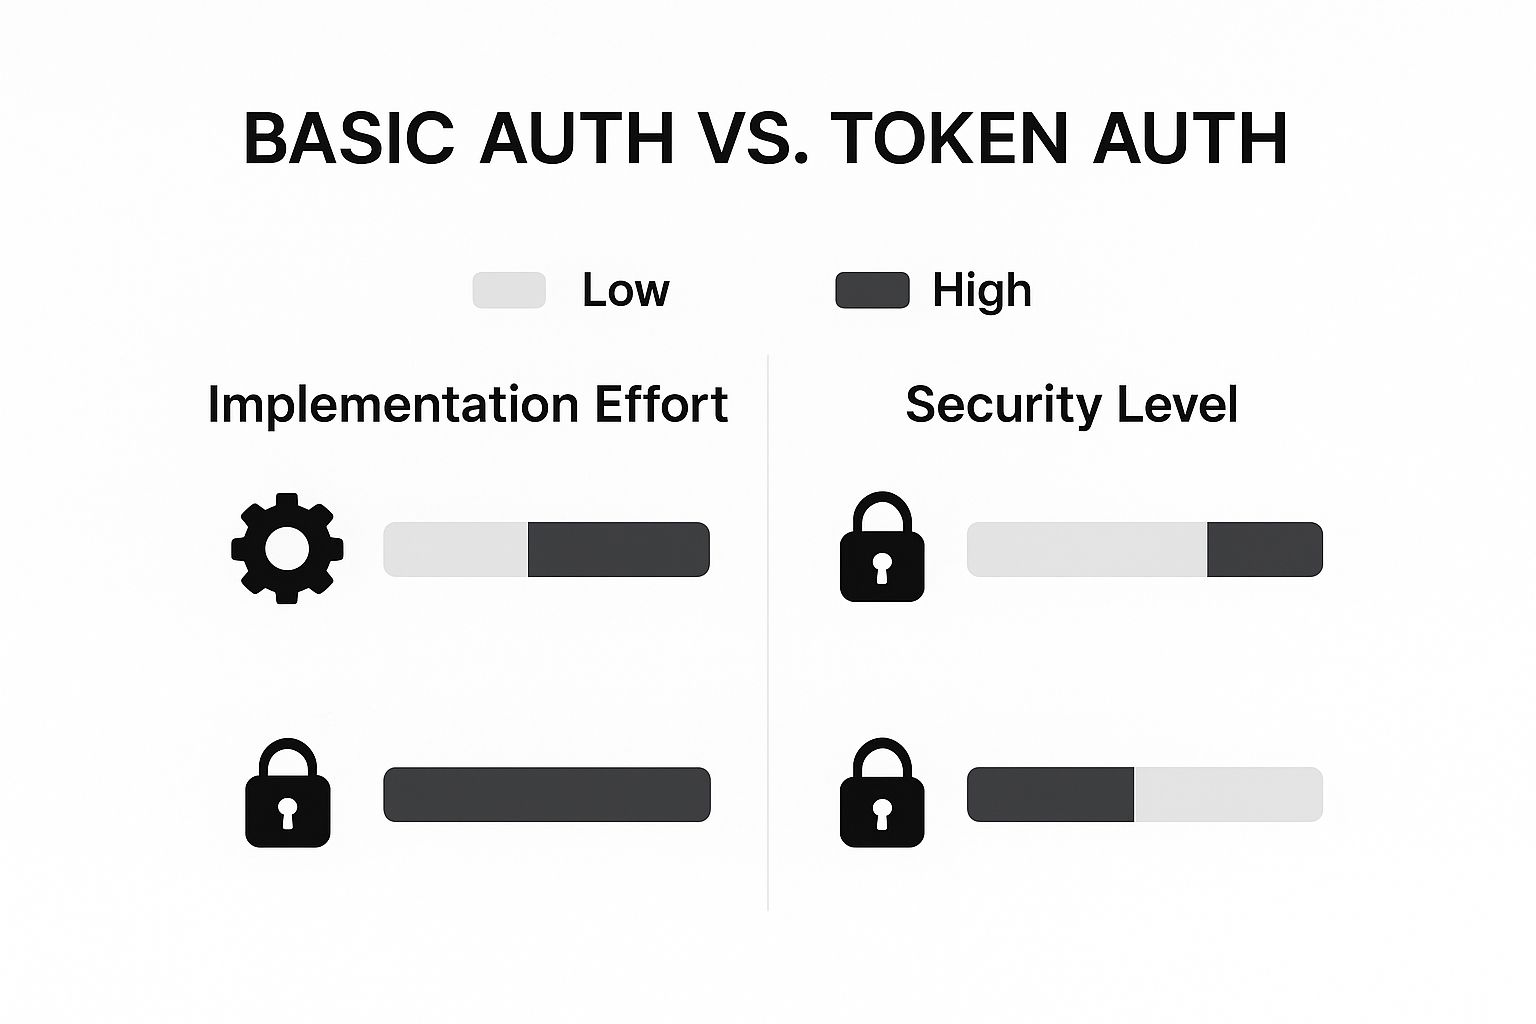
As you can see, token-based authentication is the way to go for higher security, even if it means a bit more effort to set up compared to a basic API key.
Comparing API Keys vs JWT vs OAuth2
To make the choice clearer, I've put together a simple comparison. Use this side-by-side table to quickly see the key differences and figure out which method is the best fit for your project.
| Feature | API Keys | JWT | OAuth2 |
|---|---|---|---|
| Primary Use | Identifying the calling application (machine-to-machine) | Authenticating a user and authorizing their requests | Delegating authorization to a third-party application on behalf of a user |
| State | Stateless | Stateless (the token contains all necessary data) | Stateful (requires managing access/refresh tokens and user consent) |
| Complexity | Low. Very simple to generate and validate. | Medium. Requires a library for signing/verifying tokens. | High. Involves redirects, multiple token types, and complex security considerations. |
| Security | Low. A static key that, if leaked, provides permanent access. | High. Tokens are short-lived and digitally signed to prevent tampering. | Very High. The gold standard for third-party access, with granular scopes and consent. |
| Best For | Internal services, tracking third-party API usage. | Single-page apps (SPAs), mobile apps, and secure microservices. | "Log in with Google/Facebook," and granting third-party app access to user data. |
At the end of the day, your choice comes down to what you're building. For simple machine-to-machine communication, an API key is often enough. But for anything involving user accounts or third-party data, JWT or OAuth2 are the way to go.
Ideal Use Cases for Each Method
So, when do you pull each of these tools out of your toolbox? It all comes down to context.
Use API Keys when:
You need a dead-simple way to identify and track usage from a trusted client, like a server. They're perfect for internal services talking to each other or for granting access to public data where you care more about who is making the call than a specific user's identity. Think of a weather data API that gives keys to its paying customers.
Use JWT when:
You're building a modern web or mobile app where a user logs in directly. JWTs shine in stateless architectures because the token itself carries the user's identity and permissions. This avoids the need for a session store on the server, which is a massive win for scalability, especially with single-page applications (SPAs) and native mobile apps.
Use OAuth2 when:
Your app needs to access a user's data from another service on their behalf. If you've ever used a "Log in with Google" or "Connect your Twitter account" button, you've used OAuth2. It provides a secure, standardized flow for this kind of delegated permission, which is absolutely essential for building apps that integrate with other platforms.
Ultimately, picking the right method starts with a clear picture of who (or what) is hitting your API and what they need to accomplish.
A Practical Guide to JWT User Authentication

When it comes to modern API security, especially for single-page apps and mobile clients, JSON Web Tokens (JWTs) are the undisputed workhorse. They provide a stateless, incredibly efficient way to manage user sessions.
Think about the old-school way: a server had to keep a record for every single logged-in user. With a JWT, all the necessary information is packed right into the token itself. This self-contained approach is a massive win for scalability because your server doesn't need to consult a session database, making it far easier to manage and scale out.
Let's walk through how to actually implement this popular api with authentication method.
The Initial Login and Token Creation
It all starts with a user logging in. The client shoots a username and password over to a login endpoint, something like /api/login. The server's first job, of course, is to check if those credentials are valid by looking them up in the user database.
If everything checks out, the server generates a JWT. This isn't just a random string; it's a precisely structured JSON object with three distinct parts, separated by dots:
- Header: This just contains metadata, like the signing algorithm being used (e.g., HMAC SHA256, also known as HS256).
- Payload: Here's where you put the good stuff—the user-specific data, which we call "claims." This typically includes the user ID (
subfor subject), maybe their role, and a critical expiration timestamp (exp). - Signature: This is the security glue. It’s a cryptographic signature made by combining the header, payload, and a secret key that only the server knows. The signature is what guarantees the token hasn't been messed with.
Finally, the server sends this brand-new JWT back to the client, usually in the response body.
Handling the Token on the Client Side
Once the client gets the JWT, it needs to store it somewhere safe. For web applications, the best and most secure option is an HttpOnly cookie. This is a special kind of cookie that can't be accessed by client-side JavaScript, which is your best defense against Cross-Site Scripting (XSS) attacks. If a malicious script can't read the token, it can't steal it.
From that point on, for every single request to a protected API endpoint, the client has to include the JWT. The standard way to do this is in the Authorization header, using what's known as the Bearer schema.
It looks exactly like this: Authorization: Bearer <your_jwt_here>
This simple header tells the server, "Hey, I have a token. Here it is. Let me in."
One of the most common security mistakes I see is developers storing JWTs in
localStorage. While it feels convenient,localStorageis completely exposed to any JavaScript running on your page, making it a prime target for XSS attacks. For web clients, always, always default to HttpOnly cookies.
Server-Side Token Validation Middleware
Back on the server, you definitely don't want to be writing token validation logic inside every single protected route. That would be a nightmare to maintain. The smart move is to create middleware—a function that intercepts incoming requests before they hit your main business logic.
This middleware has a few crucial jobs:
- Extract the Token: First, it looks in the
Authorizationheader for thatBearertoken. - Verify the Signature: Using the exact same secret key used to create the token, it validates the signature. If the signature is off, it means the token has been tampered with or is a complete fake. The request is immediately shut down with a 401 Unauthorized status.
- Check for Expiration: It also peeks inside the payload to find the
expclaim and makes sure the token hasn't expired. This is so important for limiting the damage an attacker can do if a token ever gets compromised.
If the token passes all these checks, the middleware decodes the payload to get the user's info (like their ID). It then attaches this user data to the request object (you'll often see this as req.user) and passes the request along to the actual route handler. This way, your protected endpoints can operate with confidence, knowing the request is from a legitimate, authenticated user whose identity is readily available.
Managing Your Authenticated API Lifecycle
Getting your API launched with solid authentication is a great first step, but it’s far from the finish line. The real challenge—and where many projects stumble—is in the day-to-day, long-term management that keeps your API secure, dependable, and ready for growth.
Think of it this way: you’ve just built a secure vault. Now you have to manage who gets a key, watch the cameras, and make sure the locks are still working months and years down the line. Without that constant vigilance, even the best-designed API can become a security risk or a frustrating bottleneck.
Keeping a Watchful Eye with API Management and Monitoring
This is precisely why dedicated API management platforms are no longer a "nice-to-have" but a core part of the toolkit. These platforms give you a single control panel to oversee your entire API ecosystem and enforce critical security policies.
Right out of the box, they help with two of the most important aspects of API security: rate limiting and traffic monitoring.
- Rate Limiting: This is your front-line defense against all sorts of abuse. It protects your backend from everything from a malicious DDoS attack to an honest mistake, like a buggy client app stuck in an infinite loop. You simply set a cap on how many requests a user can make in a certain period, and the platform handles the rest.
- Anomaly Detection: A smart management tool doesn't just count requests; it looks for patterns. It can spot suspicious activity, like a sudden flood of failed login attempts from one IP address, and flag it as a potential brute-force attack. This gives you a chance to react before a breach happens.
The industry is clearly betting big on these tools. The API management market is expected to explode from USD 6.63 billion in 2024 to an astonishing USD 51.11 billion by 2033. This massive growth underscores just how essential this kind of tooling has become. You can dive deeper into the API management market analysis to see the full picture.
Don't ever treat logging as an afterthought. When something goes wrong, your logs are often the only forensic evidence you have. They can tell you exactly what happened, who was impacted, and how the attack unfolded. They are one of the most powerful security tools at your disposal.
Planning for Change with Smart Versioning
Your API won't stay the same forever. You'll need to add features, fix bugs, and make improvements. But when you have an api with authentication, any change—no matter how small it seems—can have a ripple effect and break things for the clients who rely on your current setup.
A clear versioning strategy is the only way to evolve safely. By far, the most common and straightforward method is URI versioning, where you pop the version number right into the URL.
It looks like this:/api/v1/users/{id}/api/v2/users/{id}
This approach makes it crystal clear which version of the API a client is using. You can roll out breaking changes in /v2 without disrupting anyone still happily using the stable /v1. This gives your users a gentle off-ramp to migrate on their own schedule and keeps you from ever having to pull the rug out from under them.
Mocking Secure Endpoints for Faster Development
We've all been there. The frontend team is ready to build a new feature, but they're blocked, waiting for the backend to finish a new authenticated endpoint. Development stalls, and deadlines start to slip. This is exactly where API mocking becomes a game-changer, letting you simulate your entire API—security rules and all—right on your local machine.
Instead of hitting a roadblock, you can stand up a realistic mock of your api with authentication. This simple move decouples the frontend and backend teams, paving the way for true parallel development and slashing your release timelines. Frontend devs can build and test complete user journeys, from logging in to fetching protected data, without the actual backend API even existing yet.
Simulating Authentication With a Mock Server
A good mocking tool, like dotMock, lets you spin up mock endpoints that act just like the real thing. You can easily configure an endpoint to check for specific headers, like the classic Authorization: Bearer <token>, before sending back a successful response. If that header is missing or the token is wrong, the mock can return a 401 Unauthorized error—precisely what you'd expect from a live server.
Here’s a look at how you might configure a mock endpoint in dotMock, where you can set required headers and map them to different responses.

The real magic is in creating dynamic, stateful mocks. You're not just serving up a static JSON file; you're building a mock that responds intelligently based on the request.
Think about the possibilities. You can set up your mock server to return different data depending on the token it receives in the request. For example:
- A valid token for an admin role could return a full dataset with extra administrative fields.
- A token for a standard user might return a more limited, user-specific payload.
- An expired or invalid token could trigger a
403 Forbiddenerror message.
This is so much more powerful than just faking a successful API call. It gives you the ability to test every possible state of your application's UI—loading spinners, success notifications, permission errors, and session timeouts—long before the backend is even deployed. Your frontend code becomes more robust and resilient from the very start.
By simulating these real-world scenarios, you're building a more reliable and polished user experience from day one. It’s a small investment of time upfront that pays off massively in development speed and overall code quality. For a deeper dive, the dotMock documentation has detailed guides on setting up these rules. You can find them here: https://dotmock.com/docs/features/authentication.
Common Questions About API Authentication
Even after you've got the basics down, actually implementing API authentication can bring up some tricky, real-world questions. It's easy to get stuck on the details, and getting them wrong can open up some serious security holes. Let's walk through a few of the most common challenges developers run into.
What's the Safest Way to Store JWTs on the Client Side?
When it comes to storing JWTs in a browser, the gold standard is using HttpOnly cookies. Period.
This specific type of cookie is special because it can't be accessed by any client-side JavaScript. This is a huge deal—it completely shuts down the most common type of token theft, which happens through Cross-Site Scripting (XSS) attacks. If a malicious script can't read the token, it can't steal it.
You might be tempted to use localStorage because it seems straightforward, but it's a security trap. Any script running on your page can read everything in localStorage, making it an easy target for attackers. For any serious application, HttpOnly cookies are the way to go.
How Should I Handle Token Expiration and Refresh Tokens?
Managing the life cycle of a token is critical for both security and user experience. The key is to make your main access tokens (the JWTs) very short-lived—we're talking 15 to 60 minutes, max. This dramatically shrinks the window of vulnerability if a token ever gets compromised.
But you don't want to force users to log in every 15 minutes. That's where refresh tokens come in. They are long-lived and used to get new access tokens without asking for a password again.
Here’s how that dance typically works:
- Your app makes an API call and gets back a
401 Unauthorizederror because the access token has expired. - Instead of booting the user, the app quietly sends its refresh token to a special endpoint (like
/api/token/refresh). - The server checks the refresh token. If it's valid, it issues a fresh, new access token.
- The app then automatically retries the original API call with the new token, and the user never even notices a hiccup.
If you find yourself wrestling with that dreaded 401 error, our guide on how to understand and fix the HTTP status code 401 can be a lifesaver.
Can I Just Use an API Key for User Authentication?
Please don't. The short answer here is a hard no. Using API keys to authenticate individual users is a common anti-pattern that creates significant security risks.
API keys are built to identify a project or an application, not a person. Think of them as static, long-lived passwords meant for server-to-server communication where you have a high degree of control over the environment.
Sticking an API key in your client-side code—whether it's a web app or a mobile app—is like hardcoding your database password directly into the app itself. Anyone who finds it gets indefinite, powerful access. For user-level security, stick with protocols designed for it, like JWT or OAuth2.
Ready to test your secure API endpoints without waiting on the backend team? With dotMock, you can spin up realistic mock APIs in seconds that perfectly mimic any authentication flow, header check, or error response you need. Start mocking for free and speed up your development today.